


 We woke up this morning
 There are two ways to live your life.
One is as though nothing is a miracle.
~Albert Einstein

stomp the ice off your feet
and come in to my warm country kitchen…
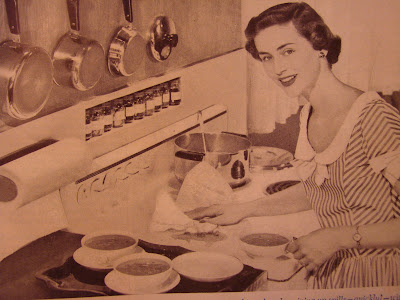 The weatherman urged people to stay in their homes, the roads were far too icy and dangerous to travel. Fortunately, we knew an ice-storm was on it’s way, so we stocked up the day before, just in case. So, while the wind whistled a frosty song, I simmered a batch of Chili with all the toppings and trimmings. Fritos Corn Chips, shredded cheddar cheese, French’s French Fried Onions, sour cream dollops, Jalapeno slices, sweet cornbread and butter. Hot Mulled Cider steamed in the crock-pot all day, with mugs standing by waiting to be filled. We sat by the fire and warmed our backs , while our simple meal warmed our tummys.

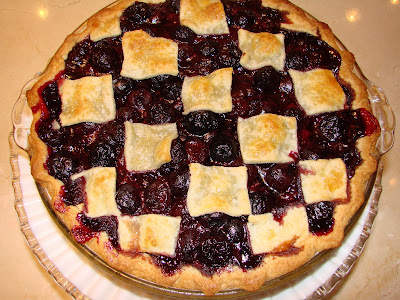 Checkerboard Cherry Pie
1 double crust (recipe below)
4 tablespoons Minute Tapioca (one tablespoon to layer on bottom of crust)
3 bags (6 cups) frozen dark sweet cherries, thawed
2 cups sugar
1/4 cup cornstarch
1/4 teaspoon cinnamon
pinch salt
1/4 teaspoon Almond Extract
-
Place dough in pie plate, crimp, sprinkle Minute Tapioca on bottom of crust
-
Mix cherries with sugar, cornstarch, 3 tbls. tapioca, cinnamon, salt, Almond Extract
-
Pour cherry mixture into crust
- Roll out other half of dough, cut into squares.
- Place on top of cherries in a checkerboard design
- Brush with milk and sprinkle sugar.
-
Cover crust edge with foil to prevent it from burning.
-
Place foil lined cookie sheet on bottom rack to catch juices.
- Bake at 375 for one hour or a little longer, until the juices are thick and clear.
Cherry pie is not my favorite, but this is a good pie if you like cherries. Next time I think I’ll make a Checkerboard Blackberry Pie. I love anything “checkerboard” so this is a fun and different design to do….easy too!
 Happy Homemaking Tips!
Creating a happy baking atmosphere is important. It opens the door to a more joyful cooking experience. (Girls just wanna have fun, right?)
 My little counter top Pie-Safe is one of my favorite vintage pieces. It was probably built by a farmer for his wife to store baked goods, like pies, cakes and biscuits. ( I wish I could go back in time and meet her and chat about her life and recipes!) It is screened in on three sides to keep the flies away (shoo-fly…don’t eat my pie!). I keep my coffee fixin’s inside. I love using old things in new ways!
 Little lamps with amber shades really warm up the nooks and crannies. The right lighting makes all the difference. Lamplight is cozier than overhead lighting which can sometimes be glaring.

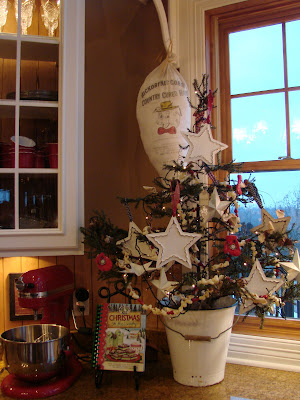
 Mama Gingerbread and her two sugared girls!
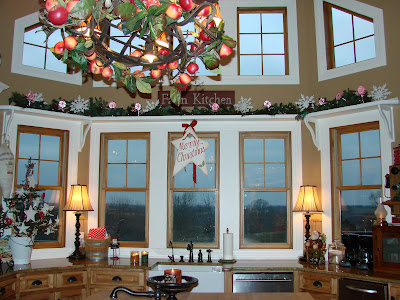
Adding a bit of whimsy to your rooms
is a delight to the eyes and warms the heart.
***************************
It’s Pie Time!
Here is my favorite double pie crust recipe:
(Carolyn Weil’s Butter Pie Crust )
1 cup cold butter (2 sticks)
2 cups all-purpose unbleached flour
1/4 cup sugar
1/4 tsp. salt
1/4 cup cold water
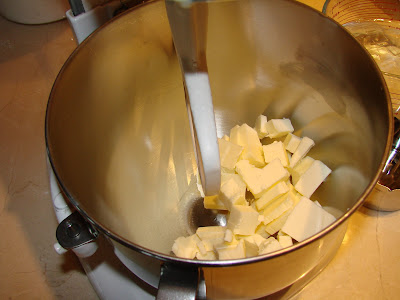
Cut the cold butter up in small pieces.
Put in mixer (or you can use a pastry cutter,
it’s just easier in a stand-up mixer.)

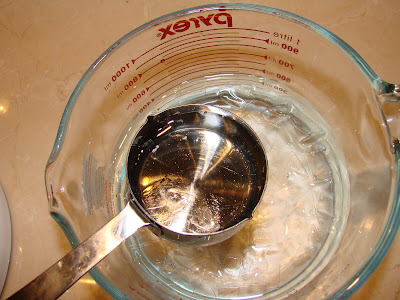 While mixing, drizzle the water in.
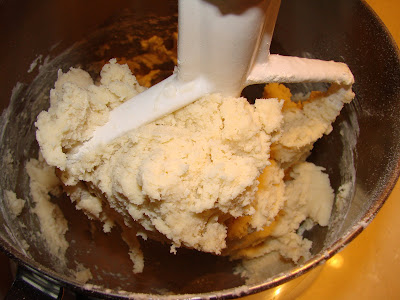
Mix on medium speed until the dough pulls away from the bowl.
 Form into a round disk and cut in half. If you are making a double crust fruit pie, make one side a little larger than the the other for the bottom half of the crust. Form both again into a disk shape. Wrap one in plastic wrap and store in refrigerator until you need it.
Sprinkle the surface with flour and roll the dough, turning the disk a 1/4 turn gathering flour underneath to keep it from sticking. You can roll on top of parchment or wax paper if you want to. If it tears, no biggie, just patch it! Roll it on your rolling pin to transfer it in the pan. Be careful not to stretch the dough to make it fit, patch again if you need to. If you stretch it, it will shrink and become a very sad pie, trust me, I know!
I think the hardest part is rolling the dough and transferring it to the pie plate. I learned by studying an online video. Carolyn Weil at Fine Cooking is amazing at pie making. Google “Carolyn Weil video” to see it. (I tried to link it but it didn’t work)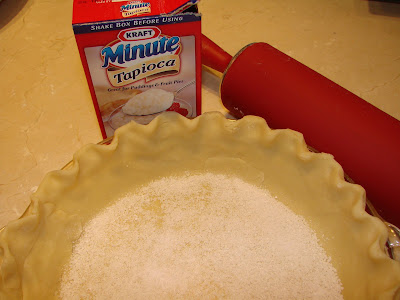
For juicy pies I always sprinkle Minute Tapioca at the bottom of the crust to prevent it from getting soggy.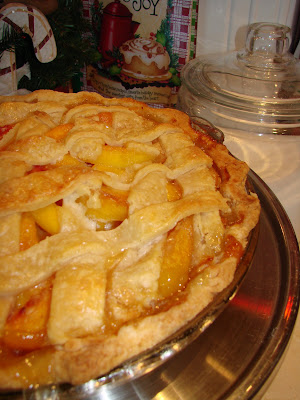 My Peach Pie Recipe: Fresh peaches are best, but you can use frozen.
1 double crust
3 tablespoons Minute Tapioca
10 fresh peaches (remove skin) or 2 bags frozen, thawed
1 3/4 cups sugar
1/4 cup flour
2 1/2 tablespoons cornstarch
dash of ground nutmeg
1 1/2 tablespoons butter
- Preheat oven to 375.
- Place bottom crust into pan and flute.
- Sprinkle Minute Tapioca on crust bottom.
- In a bowl add peaches, sugar, flour, cornstarch, nutmeg,
- Toss until mixed.
- Pour into pie crust.
- Dot with butter.
- Roll out other half of dough and cut into long strips.
- Lay them in a criss-cross fashion to form a lattice. (you don’t have to weave it)
- Tear off ends and tuck inside next to crimped edge.
- Brush with milk and sprinkle sugar
Bake on middle rack for 1 hour or more, until the juices are bubbling thick and clear. I always cover the edge of my crust. You can use foil or a pie shield. Place a foil lined cookie sheet on bottom rack to catch juices.

Well, thanks for stopping by for pie!
May God bless you this Christmas season!
And I’ve just got to tell you that Jesus is the only way to true joy and happiness, and He loves you to the moon and back…and then a zillion times that! He has wonderful things planned for you that you can’t even begin to imagine! You just need to let Him sit in the driver’s seat…and just wait for the ride of your life!
No eye has seen,
and no mind has imagined
what God has prepared
for those who love Him.
1 Corinthians 2:9
P.S. Thank you girls for all of your kind comments!! Love it, love it, love it! I really wish I could post more often, but the best I can do for now is about once a week. Maybe after Christmas I can get to it more often. I really, really enjoy sharing my thoughts with you all, and it’s even more fun to hear that you like it! Yippeeeeeeeeeeeeeeeeeee!
 24 Comments
  Add a Comment


I recently found your wonderful blog and want to be you when I grow up! I so admire your home, your recipes, your love of family, and your Christian way of life. I wish we were neighbors!
I am so, so happy to find your recipe for peach pie, which happens to be my favorite. I love your step by step directions for your pie crust because it never occured to me to use my stand up mixer. I always do it the old fashioned way and fuss that I don’t have a food processor to use like Martha! You just made my life a whole lot easier. Thanks!
You are an incredible mentor setting wonderful examples. Thanks for sharing the recipes. I didn’t know that you could use a mixer for the butter. Great idea.
I just love all the winter photos, and the great holiday inspiration and especially the pies! Peach Pie is my husbands all time favorite and next time I make it, I’m going to try your recipe. Looks delish.
Wishing you and yours a very Merry Christmas!
Smiles, Heather
Cherry pie is my all time favorite!!! I’m trying your recipe. And your kitchen is wonderful!! I love looking at all your pictures. And dreaming. LOL
Another post YIPPEEE!! When I’m reading your posts its like listening to a story and all I want to say is “and what else mom”. LOL! :-) You have such a warm heart. Thank you for the eye candy. Your kitchen is so beautiful. I’m a mother of two kids. My daughter is 4 and my son is 6 months. I love baking with my daughter. Although she is a bit messy it doesn’t really matter. Memories is what we are making. Thank you for the yummy recipes…I will write those down. Can’t wait to try them. Blessings, Nicole
Your pie looks so good! Lots of inspiration here at your homey place! What a gem you are!!
Blessings,
Mindy
Another great post!!! The pictures are so good. Your house looks so warm and cozy! I can’t wait to try the pie recipe. We recently moved to Africa and there’s no place to buy Pillsbury pie crust so I am going to have to make my own…haha!
Thanks for your inspiration!
I love the Pies, do you think that you could post one to England? No! worth a try.LOL…
Your home pictures are very inspirational,
Merry Christmas from our house to yours.
Sarah x
Sigh, your blog is a peaceful oasis on a busy busy day. Love it! Thank you! xoxo melzie
I found your blog a couple of weeks ago and love coming here!! I think you bring more warmth and comfort with each new post.
Your blog is something I look forward to each week!
Thank you so much for the recipes! Both your cherry and peach pies will be on my table on Christmas Day!
What a delicious haven from the storm you have created in your cozy kitchen! Thanks for sharing your pie recipes. I can’t wait to try them. Might I inquire about the petite pies pictured on your toy stove? Did you make them too? They are precious.
Thank You so much Ruthann for this wonderful post. I am so going to try your pie recipe, especially the crust. You make it look so easy.
Blessings,
Carol
I sure hope you are okay through all the Ice!! I saw the weather last night and gasped!! ‘Wonder if RuthAnn is okay?!!”
Seriously..
Its nice to see you bakin’ pie!!
Warm and toasty…
hugs
I love your blog. It makes me feel warm all over.
Teresa
I absolutely love your kitchen…it’s warm, it’s cozy, it’s full of love and memories..yours and those who created the wonderful pieces like your pie safe.
Thank you for helping to make my holidays that much brighter!
You are such a blessing. I adore your blog and your kitchen is just beautiful. I love, love love it!!!
Blessings to you and your family.
Dena
Your blog music is wonderful
blog is fantastic recipes divine!!!
Thanks for sharing your spirit.
Lovely! Everything from ice storms to checkerboard pies to household tips…just wonderful. But my favorite of all was hearing Perry Como sing. Thank you for creating a cozy little nook!
What a great kitchen you have and those pies… I will have to come back again for another visit. Your home looks so warm and inviting!
My goodness, what pure joy running into this wonderful, upbeat, beautiful blog! I’ll be back often and plan to put this as a link on my blog!
Keep up the good work.
Mary Lou
Marylouweidman.blogspot.com
Hi Aunt Ruthie!
Your website has been a real inspiration to me. I only discovered your website a few days ago but let me tell you, I have been coming back almost everyday to read your blogs.
I am English and I really wish to become a good pie maker one day. I have never tried making a pie before because the pie crust scares me. However I have felt truly inspired to try my hand at it.
Yesterday evening I attempted my first pie. We have plums growing in the garden and I thought what better way to eat them than in a homemade pie. I decided it would be a wonderful suprise for my partner and his family. I didn’t use a mixer I decided to do it all by hand but I had a kitchen disaster. I couldn’t get the dough right and had to throw the first batch away. Even my second batch looked really ugly but I tried not to lose heart. When I took my pie out the oven it wasn’t thick and syrupy like you explain, it was just watery so I left it longer but everytime I checked it was like water! Eventually I took my pie out of the oven feeling a little sad that it didn’t go to plan but I am not going to give up!!
I have learnt that pie making is an art to be learned and it takes time and practice. Next time I am going to make sure I put ice in my water to get it the coldest I can get and I am going to remember to protect my crust with tin foil. I am 21 years old so I have a long time to master pie making yet. Thanks Ruthie!
xoxox
Thank you so much for this wonderful receipt. I make it for my 93 year old Bible school teacher. Never received a receipt from a Christian before. Thank you. May God bless your business.